Nikon D5100 Owners Manual: A Comprehensive Guide
Unlock your Nikon D5100’s potential! This guide details features and functionalities, offering a valuable resource for both beginners and experienced photographers.
Welcome to the world of DSLR photography with the Nikon D5100! This camera offers a fantastic entry point for aspiring photographers, blending user-friendliness with impressive image quality. As highlighted in resources like the “Nikon D5100 For Dummies” manual available on the Internet Archive, understanding your camera is key to unlocking its full potential.
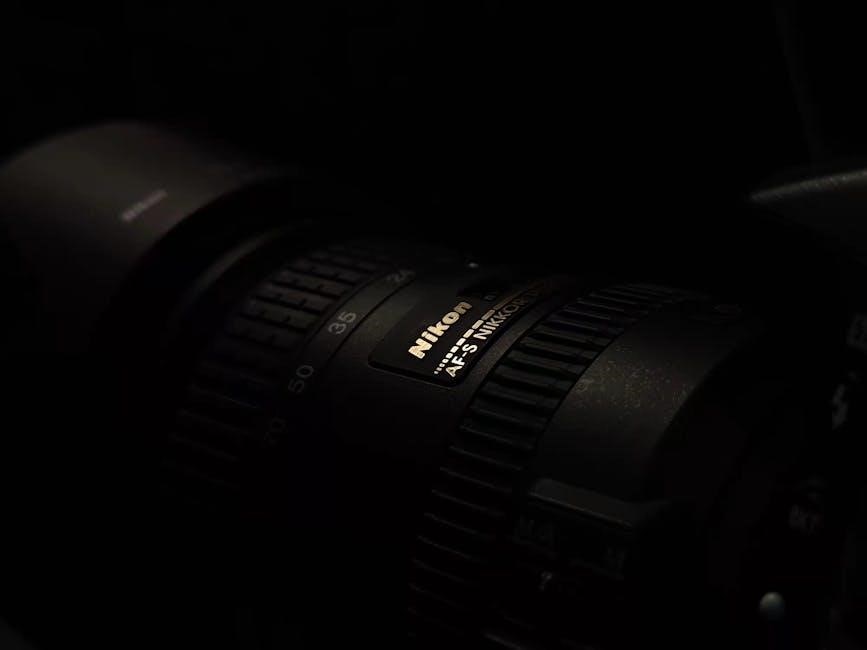
The D5100 boasts a 16.2-megapixel DX-format CMOS sensor, delivering detailed and vibrant images. Its intuitive interface and helpful Guide Mode make learning the fundamentals of photography a breeze. This manual will serve as your companion, explaining each feature and function in detail. Keep this guide handy for future reference, ensuring you can consistently capture stunning photos and videos with your new Nikon D5100.
Understanding the Camera Body & Controls
Familiarizing yourself with the Nikon D5100’s physical layout is crucial for efficient operation. The camera body houses a variety of buttons, dials, and ports, each serving a specific function. A systematic approach to learning these controls, as suggested by comprehensive manuals, will significantly enhance your shooting experience.
The front panel features the lens release button and depth-of-field preview lever. The rear panel hosts the LCD screen, control dial, and various menu buttons. The top panel includes the mode dial, shutter button, and control buttons for ISO and exposure compensation. Understanding the placement and purpose of each control will allow for quick adjustments and seamless transitions between shooting settings, ultimately improving your photographic workflow.
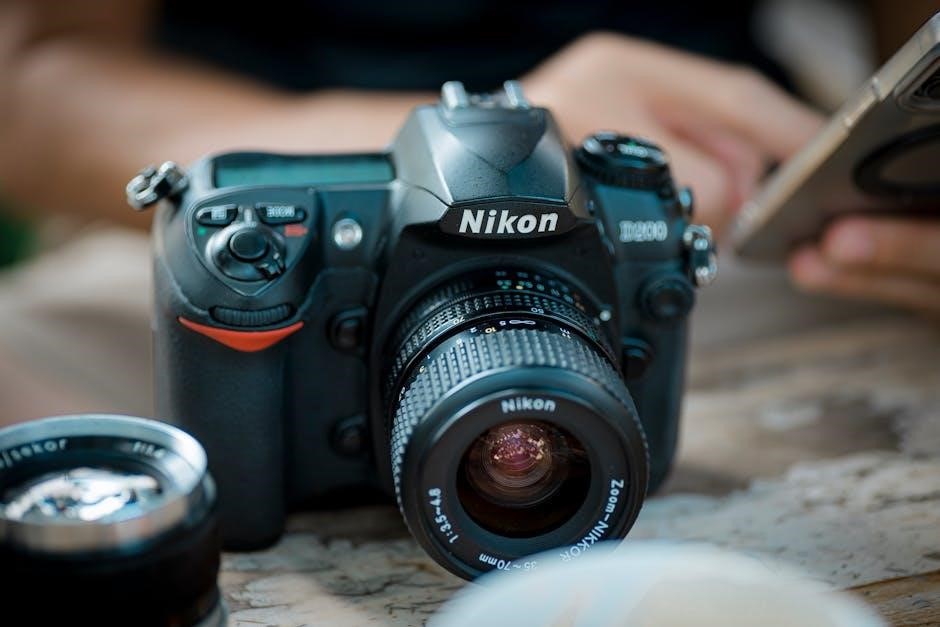
Front Panel Overview
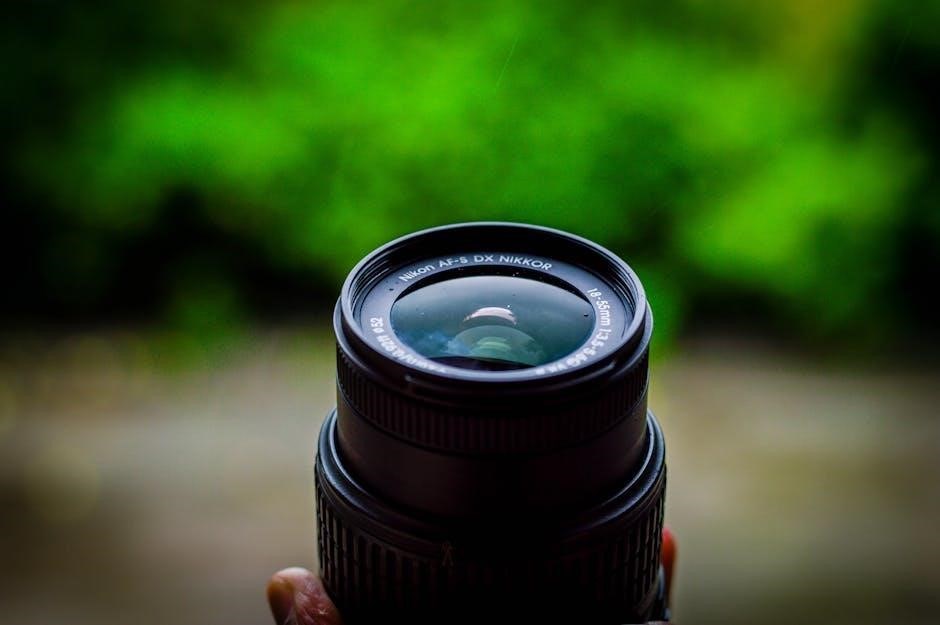
The Nikon D5100’s front panel is primarily dedicated to lens control and depth-of-field preview. You’ll find the lens release button, essential for quickly changing lenses. Pressing this button while rotating the lens allows for easy attachment and detachment. Adjacent to this is the depth-of-field preview lever.
Activating the depth-of-field preview stops down the lens to the selected aperture, allowing you to visually assess the area in focus. This is incredibly useful for landscape and portrait photography. Additionally, the front panel features the autofocus-assist illuminator, which aids focusing in low-light conditions. Understanding these elements provides fundamental control over your lens and image sharpness.
Rear Panel Overview
The rear panel of the Nikon D5100 houses the majority of its control functions. Dominating the view is the large 3.0-inch LCD screen, used for live view shooting, image playback, and navigating the camera’s menu system. To the right of the screen are buttons for playback and menu access.
Below the screen, you’ll find a directional pad with a central ‘OK’ button, used for menu navigation and selection. Further controls include buttons for image quality, ISO, white balance, and autofocus mode. The rear panel also features the Live View shooting button and the video record button, enabling quick access to these features.
Top Panel Overview
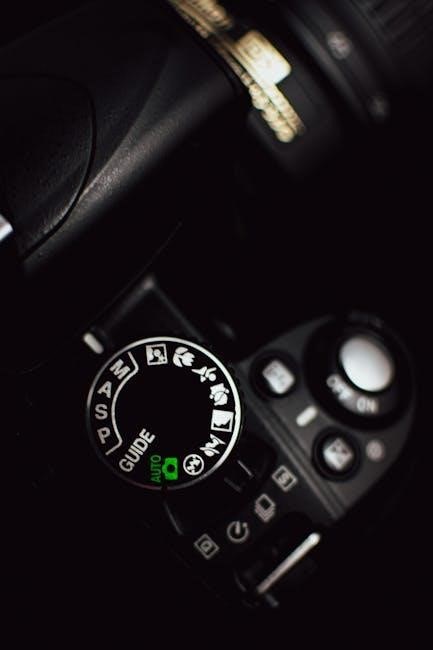
The Nikon D5100’s top panel provides essential controls for shooting. Centrally located is the mode dial, allowing quick selection of shooting modes like Auto, Scene, Program, Aperture Priority, Shutter Priority, and Manual. To the right of the mode dial is the main command dial, used for adjusting settings like aperture, shutter speed, and exposure compensation.
The top panel also features the shutter release button, surrounded by the on/off switch. Additionally, you’ll find a dedicated button for accessing the depth-of-field preview and a pop-up flash control. These controls offer direct access to frequently used settings, streamlining the shooting process.
Setting Up Your Nikon D5100
Getting started with your Nikon D5100 involves a few crucial setup steps. First, ensure you’ve properly inserted a compatible battery into the battery compartment and a memory card into the card slot – both are essential for operation. Upon powering on, the camera will guide you through an initial setup process.
This includes selecting your preferred language and accurately setting the date and time. Next, familiarize yourself with the various shooting modes available. Choosing the right mode – Auto, Scene, or one of the more advanced options – will significantly impact your photographic results. Take time to explore these settings for optimal performance.
Inserting the Battery and Memory Card
Properly inserting the battery and memory card is the first step to using your Nikon D5100. Locate the battery compartment door on the bottom of the camera and slide it open. Insert the EN-EL14 battery pack, ensuring the contacts align correctly, and click it into place.
Next, find the memory card slot, typically located on the side of the camera. Gently insert a compatible SD card (SDHC or SDXC) until it clicks. Avoid forcing the card. Always power off the camera before inserting or removing either the battery or memory card to prevent data corruption or damage to the camera.
Initial Camera Setup (Language, Date/Time)
Upon first powering on your Nikon D5100, you’ll be guided through an initial setup process. First, select your preferred language from the displayed list using the multi-selector and pressing the OK button. This ensures the camera’s menu and display are in a language you understand.
Next, accurately set the date and time. Correct date and time settings are crucial for proper image and video file organization and metadata; Use the multi-selector to adjust the year, month, day, hour, and minute, confirming each selection. Accurate settings are vital for future reference and sorting of your captured memories.
Choosing a Shooting Mode (Auto, Scene, P, S, A, M)
The Nikon D5100 offers a variety of shooting modes to suit different skill levels and photographic situations. Auto mode simplifies operation for beginners, letting the camera handle all settings. Scene modes optimize settings for specific scenarios like portraits, landscapes, or sports.
For more control, explore P (Program) mode, which allows some adjustments while maintaining automatic exposure. S (Shutter Priority) lets you control shutter speed for motion blur or freezing action. A (Aperture Priority) controls depth of field. Finally, M (Manual) mode grants full creative control over both aperture and shutter speed.
Mastering Shooting Modes
The Nikon D5100’s shooting modes empower you to capture stunning images in any situation. Auto mode provides effortless point-and-shoot simplicity, ideal for quick snapshots. Scene modes intelligently optimize settings for portraits, landscapes, close-ups, and more, delivering pre-defined results.
Stepping up, Aperture Priority (A) mode allows control over depth of field, blurring backgrounds or keeping everything sharp. Shutter Priority (S) mode lets you freeze action or create motion blur. Manual (M) mode unlocks full creative control, demanding understanding of aperture, shutter speed, and ISO for truly personalized images.
Auto Mode: Point-and-Shoot Simplicity
Nikon D5100’s Auto mode is designed for ultimate ease of use, perfect for beginners or quick shooting scenarios. Simply point the camera at your subject and press the shutter button – the camera handles all settings automatically, including focus, exposure, and white balance.
This mode excels in well-lit conditions, delivering consistently good results without requiring any photographic knowledge. While offering minimal creative control, Auto mode ensures you never miss a moment. It’s an excellent starting point for learning, allowing you to focus on composition before exploring more advanced settings.
Scene Modes: Optimizing for Specific Situations
The Nikon D5100 offers a variety of Scene Modes, pre-programmed settings tailored for common shooting scenarios. These modes optimize camera settings for portraits, landscapes, close-ups, sports, and night photography, among others. Selecting the appropriate scene mode ensures optimal image quality without manual adjustments.
For example, ‘Portrait’ mode blurs the background, emphasizing the subject, while ‘Landscape’ prioritizes sharpness and vibrant colors. ‘Sports’ utilizes a faster shutter speed to freeze action. Scene modes are a step up from Auto, providing more control while remaining user-friendly, ideal for capturing specific moments effectively.
Aperture Priority (A) Mode: Controlling Depth of Field
Aperture Priority (A) mode on the Nikon D5100 allows you to control the aperture, directly influencing the depth of field in your images. A wider aperture (lower f-number like f/2.8) creates a shallow depth of field, blurring the background – perfect for portraits. Conversely, a narrower aperture (higher f-number like f/16) yields a greater depth of field, keeping more of the scene in focus, ideal for landscapes.
The camera automatically adjusts the shutter speed to achieve proper exposure. Mastering aperture control unlocks creative possibilities, letting you emphasize subjects and shape the visual narrative of your photographs.
Shutter Priority (S) Mode: Capturing Motion
Shutter Priority (S) mode on your Nikon D5100 grants control over the shutter speed, essential for depicting motion. A fast shutter speed (e.g., 1/1000s) freezes action, perfect for sports or wildlife photography. Conversely, a slow shutter speed (e.g., 1/30s) blurs motion, conveying a sense of movement – ideal for waterfalls or light trails.
The camera automatically selects the appropriate aperture for correct exposure. Experimenting with shutter speed allows you to creatively represent time and movement within your images, adding dynamic energy or a smooth, ethereal quality.
Manual (M) Mode: Full Creative Control
Manual (M) mode on the Nikon D5100 unlocks complete photographic control. Here, you independently set both aperture and shutter speed, dictating depth of field and motion blur. This mode demands understanding of the exposure triangle – the interplay between aperture, shutter speed, and ISO.
While challenging initially, M mode fosters creativity. You can precisely achieve your desired aesthetic, overriding the camera’s automatic settings. Use the light meter as a guide, adjusting settings until proper exposure is reached. Mastering M mode is key to becoming a truly proficient photographer.
Focusing and Exposure
Achieving sharp, well-exposed images hinges on mastering focus and exposure settings. The Nikon D5100 offers various autofocus (AF) modes: AF-S (single-servo) for stationary subjects, AF-C (continuous-servo) for moving subjects, and AF-A (automatic) which switches between the two.
Focus Area Modes determine how the camera selects focus points – Single-point for precise control, Dynamic-area for tracking moving subjects, and Auto-area for letting the camera decide. Understanding Exposure Compensation allows you to fine-tune brightness, overriding the camera’s meter when necessary for accurate results.
Autofocus Modes (AF-S, AF-C, AF-A)
The Nikon D5100 provides three primary autofocus modes to suit diverse shooting scenarios. AF-S (Single-servo AF) is ideal for still subjects; the camera focuses once when you half-press the shutter button. AF-C (Continuous-servo AF) continuously tracks a moving subject, adjusting focus as it moves – perfect for sports or wildlife.
AF-A (Automatic-servo AF) intelligently switches between AF-S and AF-C, attempting to determine the subject’s motion. While convenient, mastering AF-S and AF-C offers greater control. Experiment with each mode to understand their strengths and weaknesses for optimal results.
Focus Area Modes (Single-point, Dynamic-area, Auto-area)
The D5100 offers several focus area modes for precise control over where the camera focuses. Single-point AF allows you to select a specific focus point, ideal for stationary subjects requiring pinpoint accuracy. Dynamic-area AF uses multiple focus points around your selected point, tracking moving subjects within that area.
Auto-area AF lets the camera automatically select focus points, suitable for general photography but offering less control. Understanding these modes is crucial for achieving sharp images. Experiment to determine which best suits your subject and shooting style for consistently focused results.
Understanding Exposure Compensation
Exposure compensation allows you to fine-tune the brightness of your images, overriding the camera’s automatic metering. When the camera underestimates light, resulting in underexposed (dark) photos, use positive compensation (+ values) to brighten the image. Conversely, if the camera overestimates light, leading to overexposed (bright) photos, use negative compensation (- values) to darken it.
This is particularly useful in challenging lighting situations like snow or backlit scenes. Mastering exposure compensation ensures you capture images that accurately reflect your artistic vision, preventing washed-out highlights or crushed shadows.
Working with Images and Video
The Nikon D5100 allows for easy review and management of your captured content. You can view images directly on the camera’s LCD screen, utilizing zoom functionality for detailed inspection. Deleting unwanted images is straightforward through the playback menu, freeing up valuable memory card space.
Beyond stills, the D5100 also excels in video recording. Access video mode to capture Full HD 1080p footage. Familiarize yourself with the video recording settings to adjust quality and frame rates. Regularly transferring your images and videos to a computer ensures safe storage and facilitates editing.
Viewing Images on the LCD Screen
The Nikon D5100’s LCD screen is your primary tool for reviewing captured photographs. Press the playback button (typically indicated by a triangle) to enter playback mode. Use the multi-selector to navigate through your images. The zoom button allows for closer inspection of details, ensuring sharpness and composition are to your liking.
You can also display shooting information, like aperture, shutter speed, and ISO, alongside the image. Utilize the display mode button to cycle through different information overlays. Rotate images for comfortable viewing and use the histogram display to assess exposure accuracy.
Deleting Images
Removing unwanted photos from your Nikon D5100 is straightforward. In playback mode, select the image you wish to delete and press the delete button (often a trash can icon). A confirmation dialog will appear; confirm your choice to permanently remove the file. You can delete images individually or select multiple images for batch deletion.
Be cautious, as deleted images are typically unrecoverable! The camera offers options to protect images from accidental deletion by locking them. Utilize the protect function for valuable shots. Regularly reviewing and deleting images frees up valuable memory card space for future photography.
Recording Video with the D5100
The Nikon D5100 allows for Full HD video recording at various frame rates. To start recording, switch to Live View mode and press the record button (red film icon). Monitor your recording time remaining on the LCD screen. The camera automatically focuses during video recording, but you can also manually adjust focus if needed.
Sound is recorded via the built-in microphone, or you can connect an external microphone for improved audio quality. Remember to use a compatible SD card with sufficient write speed for smooth video capture. Review your footage immediately after recording to ensure quality and proper settings.
Menu Navigation and Customization
The Nikon D5100’s menu system is accessed via the ‘Menu’ button on the rear panel. It’s organized into several tabs – Shooting, Recording, Setup, Custom Settings, and Retouch. Use the directional pad to navigate and the ‘OK’ button to select options.
Customizing settings allows you to tailor the camera to your preferences. Adjust image quality, size, and file type. Explore Custom Settings to personalize button functions and display options. Regularly reviewing the menu helps you discover features and optimize your shooting experience. Don’t be afraid to experiment!
Understanding the Menu System
The D5100’s menu is logically structured into five main tabs: Shooting, Recording, Setup, Custom Settings, and Retouch. Each tab contains numerous options, categorized for easy navigation. The Shooting menu controls image capture settings, while Recording manages video options. Setup handles general camera configurations like date/time and language.
Custom Settings allows personalized button assignments and display preferences. Retouch offers in-camera image editing tools. Use the directional pad to move between options and the ‘OK’ button to select. Remember to save any changes made within the menus to ensure they are applied.
Customizing Camera Settings
The Nikon D5100 offers extensive customization options within the Custom Settings menu. Here, you can personalize button functions, tailoring the camera to your shooting style. Assigning frequently used settings to the ‘fn’ button provides quick access. Adjust the information displayed in the viewfinder and on the LCD screen for a clearer shooting experience.
Customize the autofocus behavior, metering settings, and image quality preferences. Explore options like setting up a self-timer delay or adjusting the depth-of-field preview. These customizations enhance workflow and allow you to fully leverage the camera’s capabilities.
Setting Image Quality and Size
Controlling image quality and size is crucial for balancing file size and detail. Within the shooting menu, you can select from various JPEG quality levels – Fine, Normal, and Basic – impacting file size and compression. For maximum detail, choose RAW (NEF) format, allowing extensive post-processing flexibility.

Image size options include Large, Medium, and Small, determining the pixel dimensions of your photos. Larger sizes provide more detail for printing or cropping, while smaller sizes are suitable for web use. Consider your intended use when selecting these settings to optimize storage and image quality.
Troubleshooting Common Issues
Encountering problems? This section addresses frequent Nikon D5100 issues. If the camera fails to power on, ensure the battery is fully charged and correctly inserted. Lens errors often indicate connection problems; try reattaching the lens, checking the contacts for debris, or using a different lens.
Memory card errors can stem from a corrupted card or incompatibility. Attempt a different card, or format the existing one within the camera (be aware this erases all data!). Refer to the full manual for detailed error code explanations and further troubleshooting steps if these solutions don’t resolve the issue.
Camera Not Turning On
Is your Nikon D5100 refusing to power up? First, verify the battery is fully charged using the charger and indicator light. Ensure the battery is correctly inserted into the battery compartment, checking for proper alignment and a secure click. Try a different, known-working battery if available to rule out a battery issue.
Inspect the battery contacts within the camera for any dirt or corrosion, cleaning them gently with a dry cloth. If the problem persists, check the power switch position – ensure it’s fully moved to the ‘ON’ position. A reset might help; remove the battery and memory card, wait a few minutes, then reinsert and try again.
Lens Errors
Encountering “Lens error” messages on your Nikon D5100? This often indicates a communication problem between the camera body and the lens. Begin by powering off the camera, then carefully remove and reattach the lens, ensuring it clicks securely into place. Inspect both the lens mount on the camera and the lens itself for any dust, debris, or damage.
Clean the electrical contacts on both the lens and the camera mount with a soft, dry cloth. Try a different Nikon lens if possible to determine if the issue lies with the lens or the camera body. If the error continues, a professional lens repair or camera service may be necessary to diagnose and resolve the problem.
Memory Card Errors
Experiencing issues with your memory card on the Nikon D5100? Common errors include “Card error,” “No card,” or the camera failing to recognize the card. First, ensure the card is properly inserted and locked (if applicable). Try a different memory card to isolate whether the problem is with the card itself or the camera’s card reader.
If the card is recognized by a computer, back up your photos immediately and consider reformatting the card within the camera (not on the computer). Avoid using damaged or low-quality cards. If errors persist with multiple cards, a camera service may be required to address a potential issue with the card slot.